
The Complete Guide to Ollama: Local LLM Inference Made Simple
A deep dive into Ollama’s architecture, going through model management, OpenAI API schema and local inference integrations with CLI, Docker and Python.
Welcome to Neural Bits. Each week, I write about practical, production-ready AI/ML Engineering. Join over 6600+ engineers and build real-world AI Systems.
It has been seven years since the original GPT architecture was developed, and roughly three years since solutions to deploy LLMs both locally and in the cloud became mainstream.
Just two years ago, we got the first release of vLLM, soon followed by llama.cpp, GGUF, Ollama, SG-Lang, and many others. At first, their roles weren’t entirely clear, but over time, each found its niche and purpose within the LLM ecosystem.
A key responsibility of an AI Engineer is to design an AI System, going through all of its components. From data ingestion to building the knowledge base, preference finetuning the LLMs, prompt engineering, building Agents, and enhancing them with tools, memory, and evaluation workflows, and the list goes on.
However, before starting work on all the above-mentioned, an AI Engineer would have to think about the entire scope of a project and evaluate and select the most appropriate tools for each workload across the AI development pipeline.
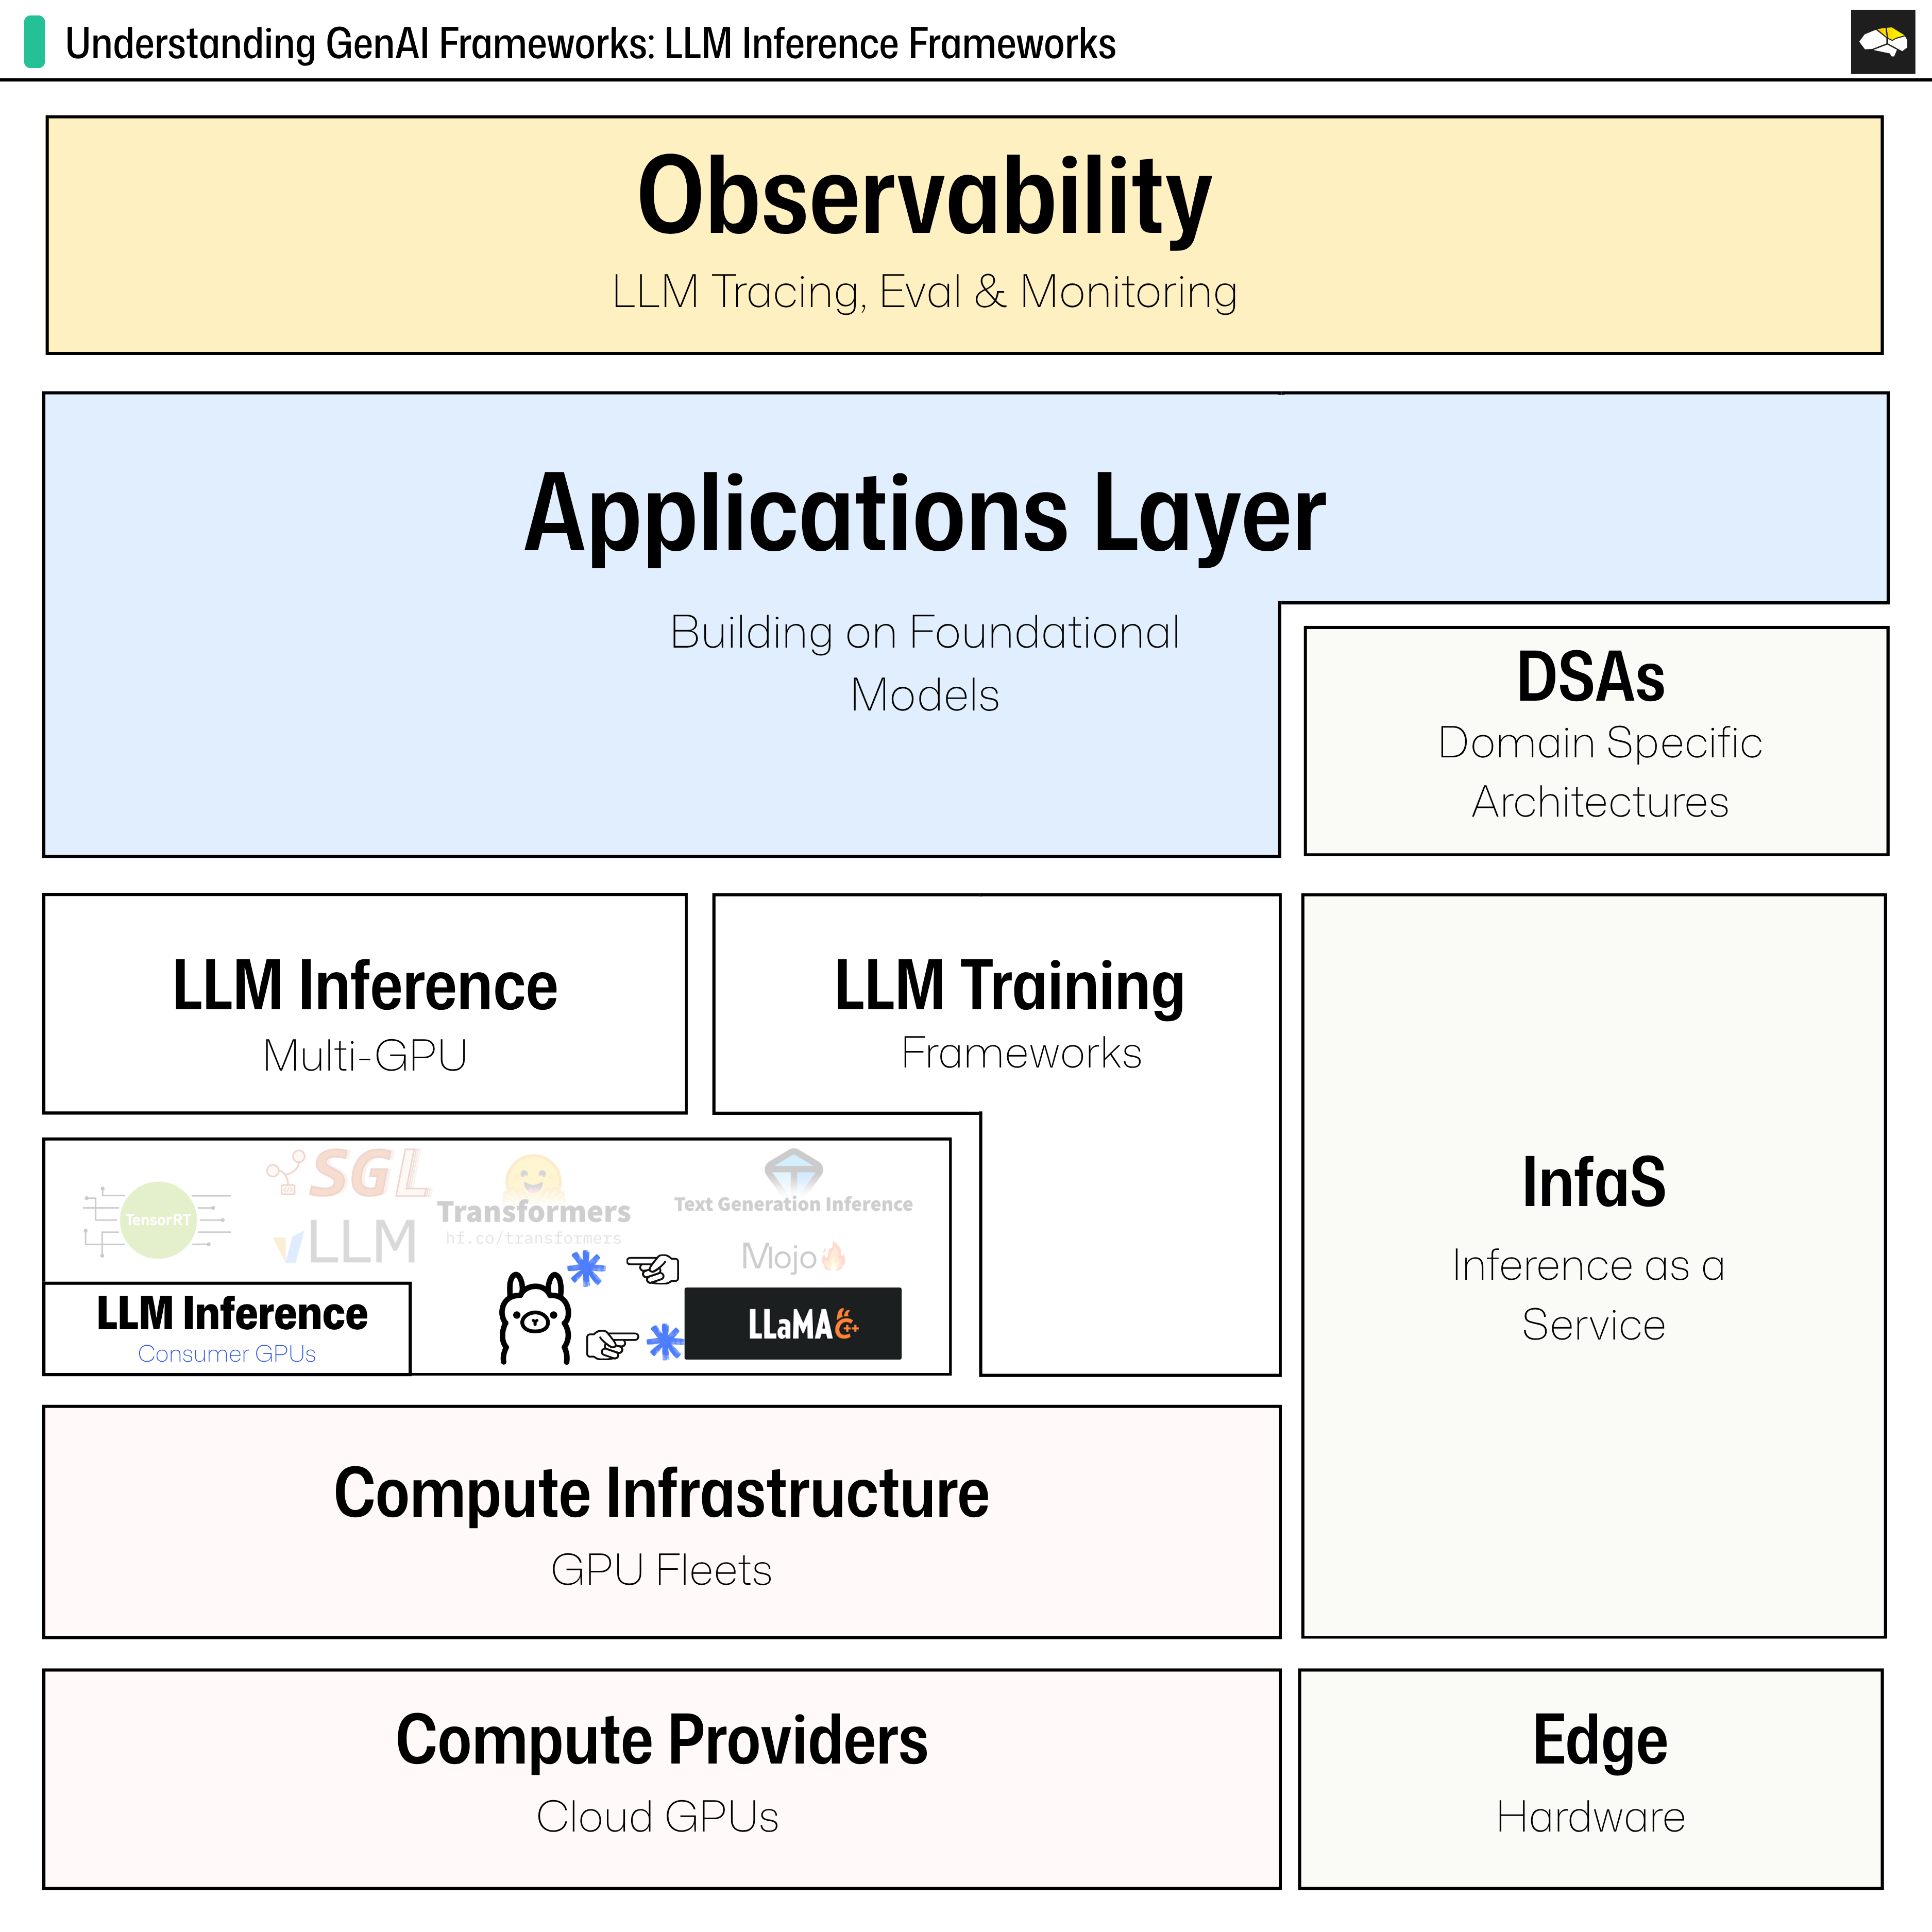
This time, we’re talking about Inference, specifically LLM Inference solutions for rapid prototyping of any System that relies on LLMs or Agents.
The AI landscape is quite large enough, with more tools and frameworks joining the race, but there are only a few that deserve your time and attention, judging by the most common use cases an AI Engineer would work on.
In this article, we’ll focus on Ollama, which is currently one of the simplest and most efficient ways to run and develop with LLMs locally, without the burden of complex setups and configurations.
Let’s define the structure of this article.
Table of Contents
What is Ollama, and why does it matter
[VIDEO] What happens once you install Ollama
The High-Level Architecture
[VIDEO] Customizing Ollama Models Locally
[VIDEO] Adding Models from HuggingFace
[VIDEO] Running Ollama OpenAI API Python Client
Running Ollama Server in Docker
Conclusion
1. What is Ollama, and why does it matter
Ollama is an open-source inference framework that simplifies the process of running LLMs locally. The repository has over 500 contributors and over 150k stars, making it a mature, active, and well-maintained codebase with frequent releases, which enforces its position in the LLM Inference landscape.
Pro Tip: Whenever considering a tool or framework to use, always look for the liveness of the codebase, stars, contributions, PRs and releases and pick something that’s active and established within the field.
Using Ollama, you can easily prototype and build applications on top of LLMs without having to connect to APIs or Cloud LLM Providers. Although it also contains a model registry and exposes an API connection just like the others, you can run your LLM models locally with Ollama.
What is the Key Value Proposition of Ollama?
We should start with Privacy, running LLMs on your local hardware.
Next would be Accessibility, as it simplifies the setup massively. For example, to get your model running locally with `llama.cpp`, you might spend a few hours around the `Makefile`.
Third, Customisation, bring your own models to be served with Ollama, with a few extra steps of converting the format to a Modelfile for non-existing ones.
Lastly, Quantization allows LLM models to run on older-generation NVIDIA GPUs, lower VRAM GPUs, AMD, M1, traditional CPUs, or even Edge Hardware.
Amongst developers that are working on LLM-powered applications, Ollama is one of the top choices for the local inference serving component.
Before diving into the interesting bits of how Ollama works, first, let’s go through and understand how it’s installed on your system, as there are a few subtle differences varying across macOS, Linux, and Windows.
What happens once you install Ollama
Ollama is built in Go, also known as Golang, which is a compiled language alongside others such as C++, C, Rust, or C#.
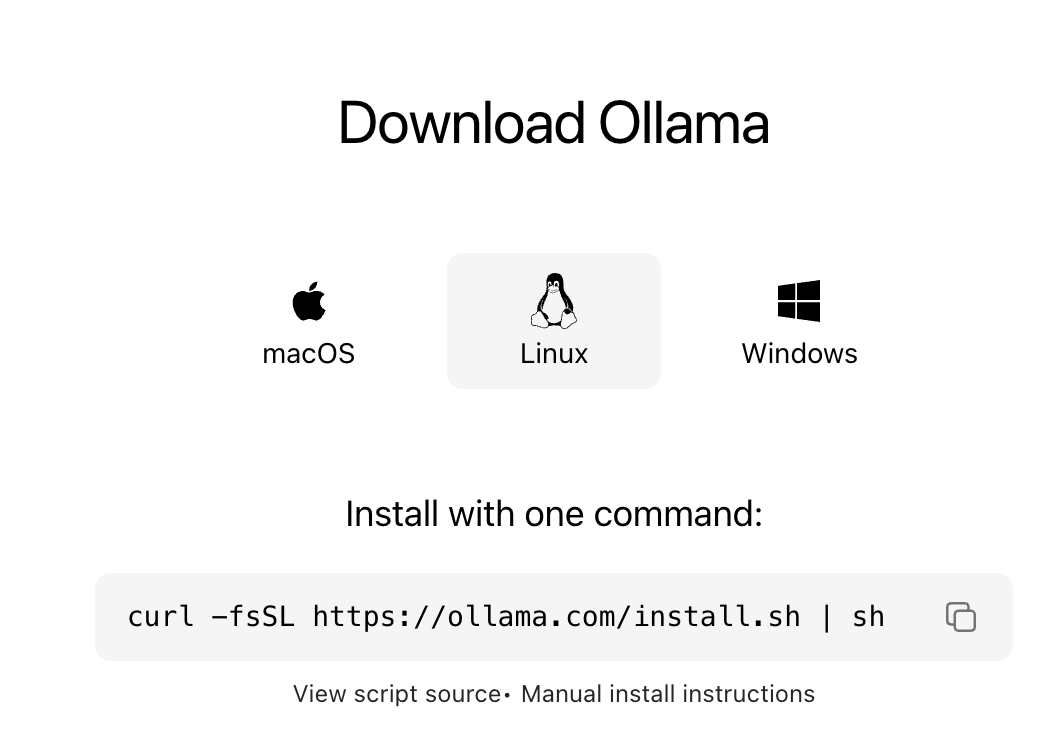
That means, when you install it, a compiled binary for your specific CPU architecture and OS configuration is copied and added to your applications. On Windows, the installer comes with an `.exe`, on macOS, the installer comes as a `.pkg`, whereas on Linux, you install it via an `install.sh`.
MacOS and Windows
On Windows and Mac, the setup is quite straightforward in terms of what’s happening under the hood. You go to the Ollama website, select your OS, download the installer, and then a GUI guides you through the process.

For Linux, on the other hand, a few more steps take place, which you might be curious about, and that’s what we’re diving into in the next section.
Ollama on Linux
On Linux, we get an `install.sh` script, which sets up Ollama on our Linux machine.
Most of the time, you’d be installing it using the provided command, but for engineers who require customization or want to disable specific Flags, there’s a Manual Install workflow one could take. For instance, as an AI Engineer installing Ollama locally, you might want to:
Disable Ollama from starting automatically when your System boots up.
Test Ollama on CPU only, disable HW Acceleration.
Pin Ollama to a specific CUDA version on your System.
Tip: For all the steps mentioned above, you’ll want to manually install it. For a default instalation, which is the common option - just use the install.sh script.
The System Configuration for Ollama on Linux
Let’s do a short but deep dive on what’s happening underneath when you run the install.sh script to install Ollama on Linux. To summarize that, we have the following 3 components:
Installing the System Dependencies
NEEDS=$(require curl awk grep sed tee xargs)
if [ -n “$NEEDS” ]; then
    status “ERROR: The following tools are required but missing:”
    for NEED in $NEEDS; do
        echo “  - $NEED”
    done
    exit 1
fi

for BINDIR in /usr/local/bin /usr/bin /bin; do
    echo $PATH | grep -q $BINDIR && break || continue
done
OLLAMA_INSTALL_DIR=$(dirname ${BINDIR})
Configuring Ollama as a SystemD Service
cat <<EOF | $SUDO tee /etc/systemd/system/ollama.service >/dev/null
[Unit]
Description=Ollama Service
After=network-online.target

[Service]
ExecStart=$BINDIR/ollama serve
User=ollama
Group=ollama
Restart=always
RestartSec=3
Environment=”PATH=$PATH”

[Install]
WantedBy=default.target
Installing GPU Libraries (if GPU present)
check_gpu() {
    # Look for devices based on vendor ID for NVIDIA and AMD
    case $1 in
        lspci)
            case $2 in
                nvidia) available lspci && lspci -d ‘10de:’ | grep -q ‘NVIDIA’ || return 1 ;;
                amdgpu) available lspci && lspci -d ‘1002:’ | grep -q ‘AMD’ || return 1 ;;
            esac ;;
        lshw)
            case $2 in
                nvidia) available lshw && $SUDO lshw -c display -numeric -disable network | grep -q ‘vendor: .* \[10DE\]’ || return 1 ;;
                amdgpu) available lshw && $SUDO lshw -c display -numeric -disable network | grep -q ‘vendor: .* \[1002\]’ || return 1 ;;
            esac ;;
        nvidia-smi) available nvidia-smi || return 1 ;;
    esac
}
Follow this live-coding tutorial, where we walk through all these components.
The High-Level Architecture
When you download Ollama for Mac or Windows, you get an executable that, once started, automatically brings up an HTTP server as a process in the system’s applications.
Ollama is composed of three components: Model, Server, and Inference Engine. Starting with the model, this is your GGUF LLM Checkpoint.
Tip: To see a similar deep-dive on GGUF, GGML and llama.cpp, see this previous article.
Given that, Ollama is not actually handling the heavy processing of the AI inference. It just acts as an abstraction layer on top to orchestrate everything, with the heavy lifting being done by the llama.cpp → GGLM → GGUF pipeline.
In Figure 4 below, we describe a summarized diagram of how everything couples together:
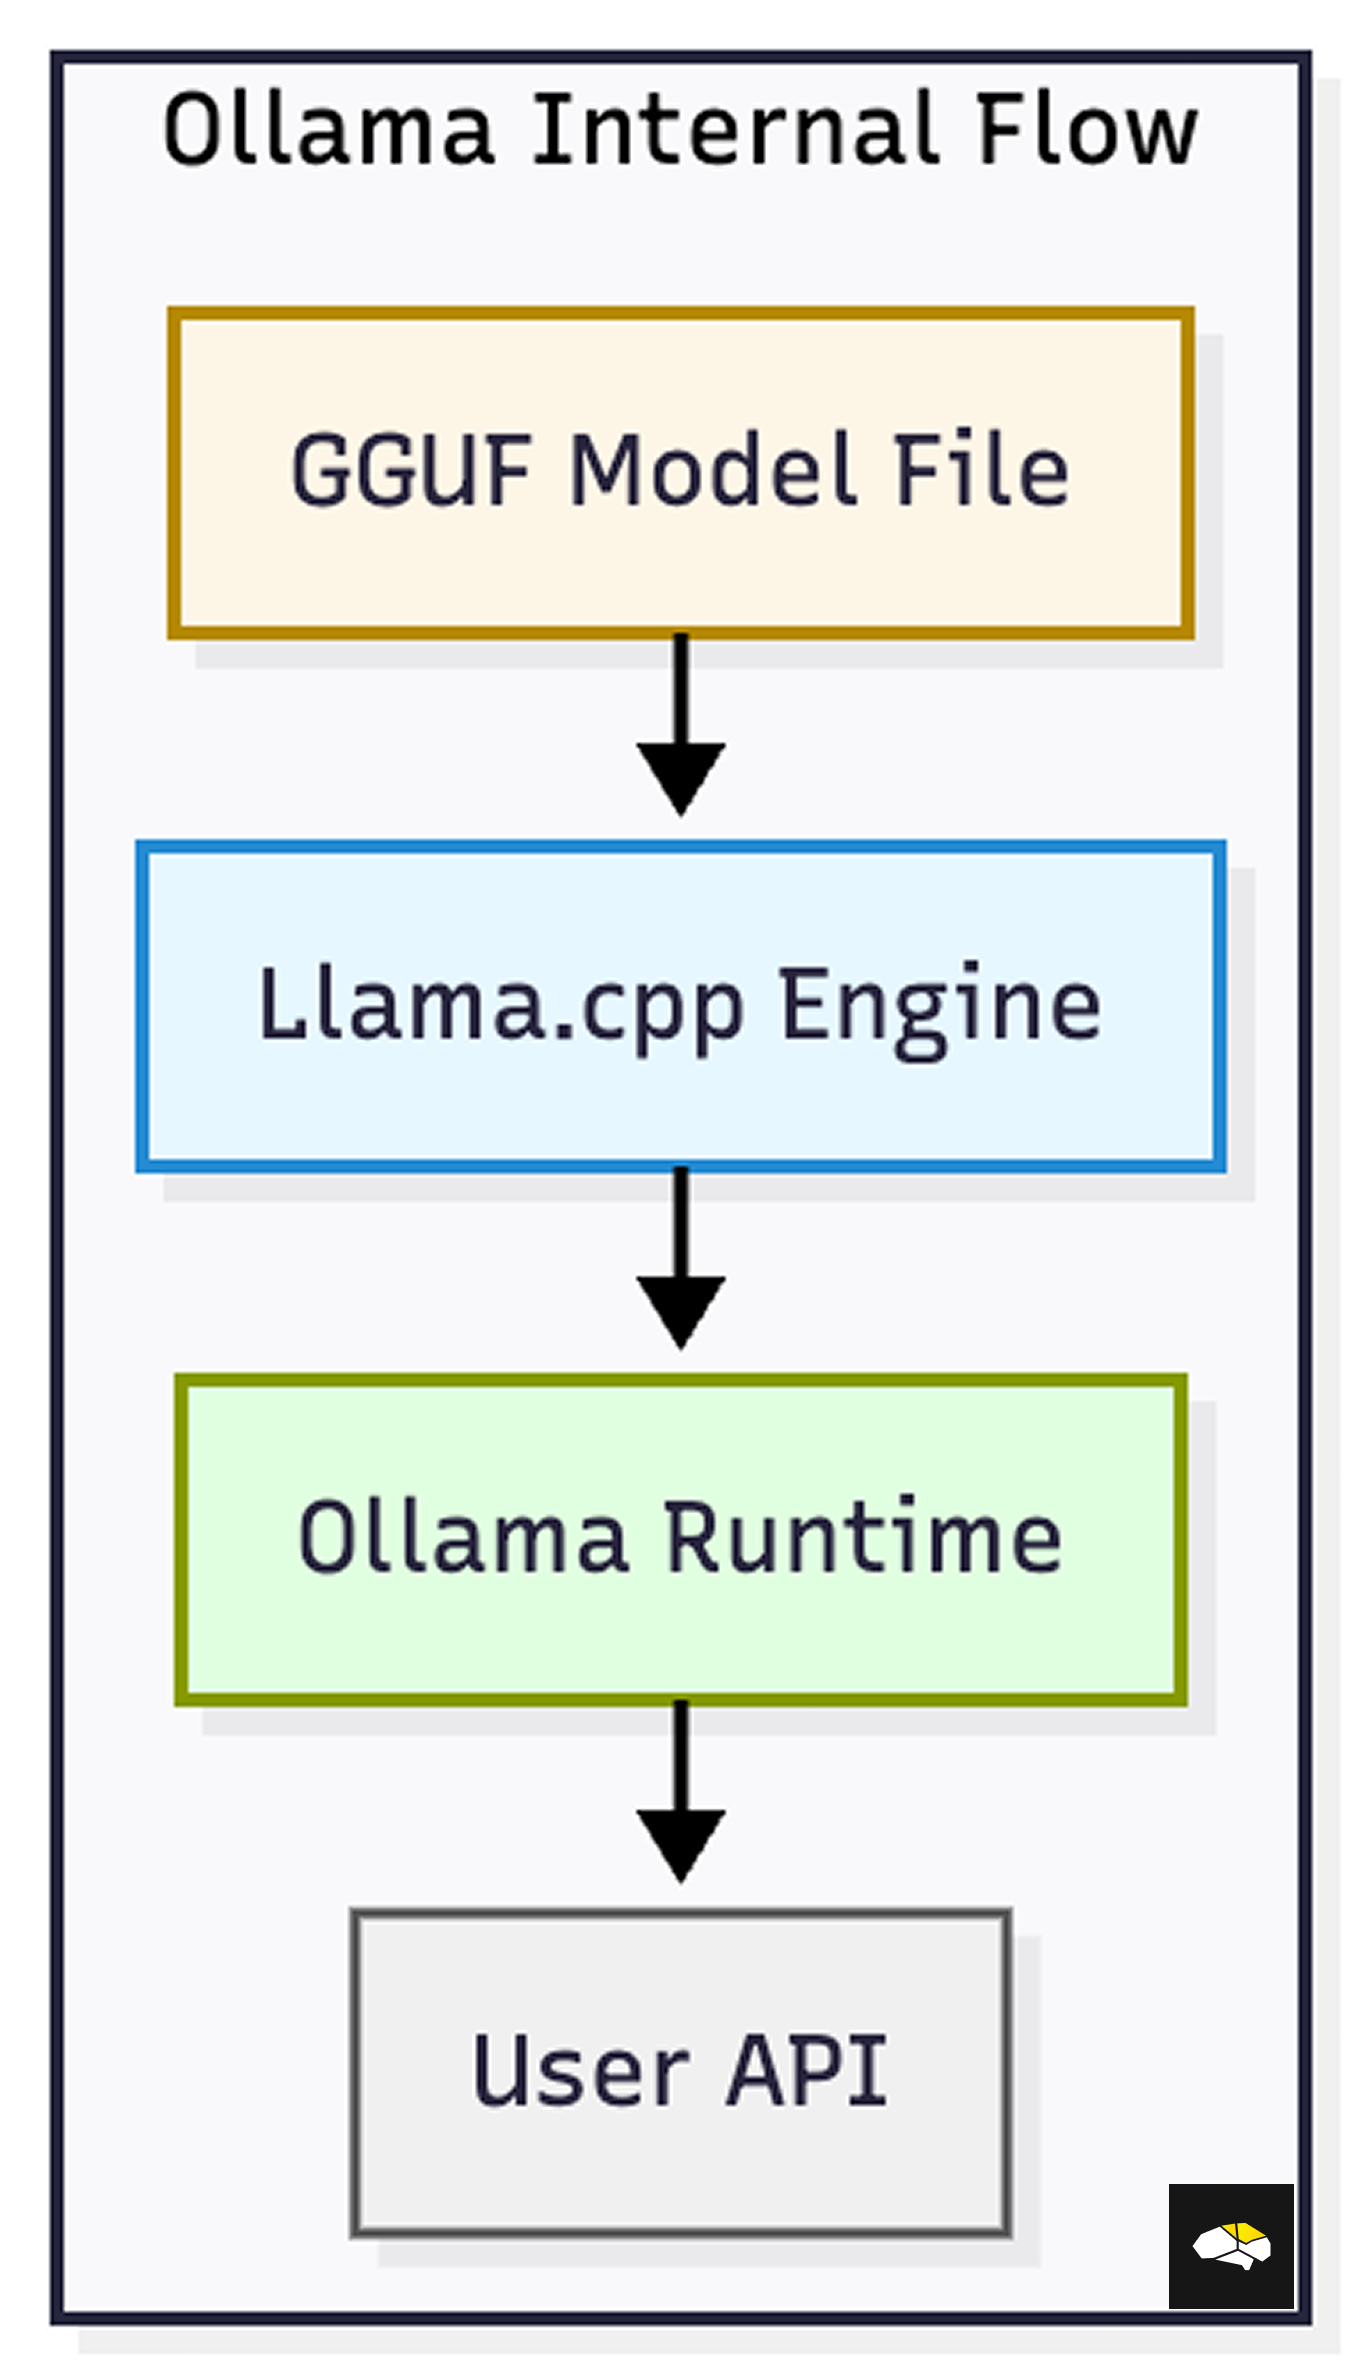
From a workflow perspective, this is how Ollama handles things under the hood:
You have an LLM Model Checkpoint in GGUF
When Ollama loads the model, it starts a llama.cpp inference server as a separate server, and passes the GGUF model path to it.
The llama.cpp server unpacks the GGUF file using the GGML library and creates a computation graph of the model.
When Ollama receives a Prompt, it routes it to the llama.cpp server that handles the workload.
Ollama then streams the decoded text token to the caller or returns the full response.
The takeaway here is that Ollama is an easy-to-set-up and use abstraction. Getting started with llama.cpp directly involves building the binary for your system architecture, running manual scripts, and learning additional commands.
We’re unpacking Ollama first as it’s both the fastest and familiar way to get up and running with local LLMs.
Query: In future tutorials, we might also look into low-level llama.cpp for Advanced Users.
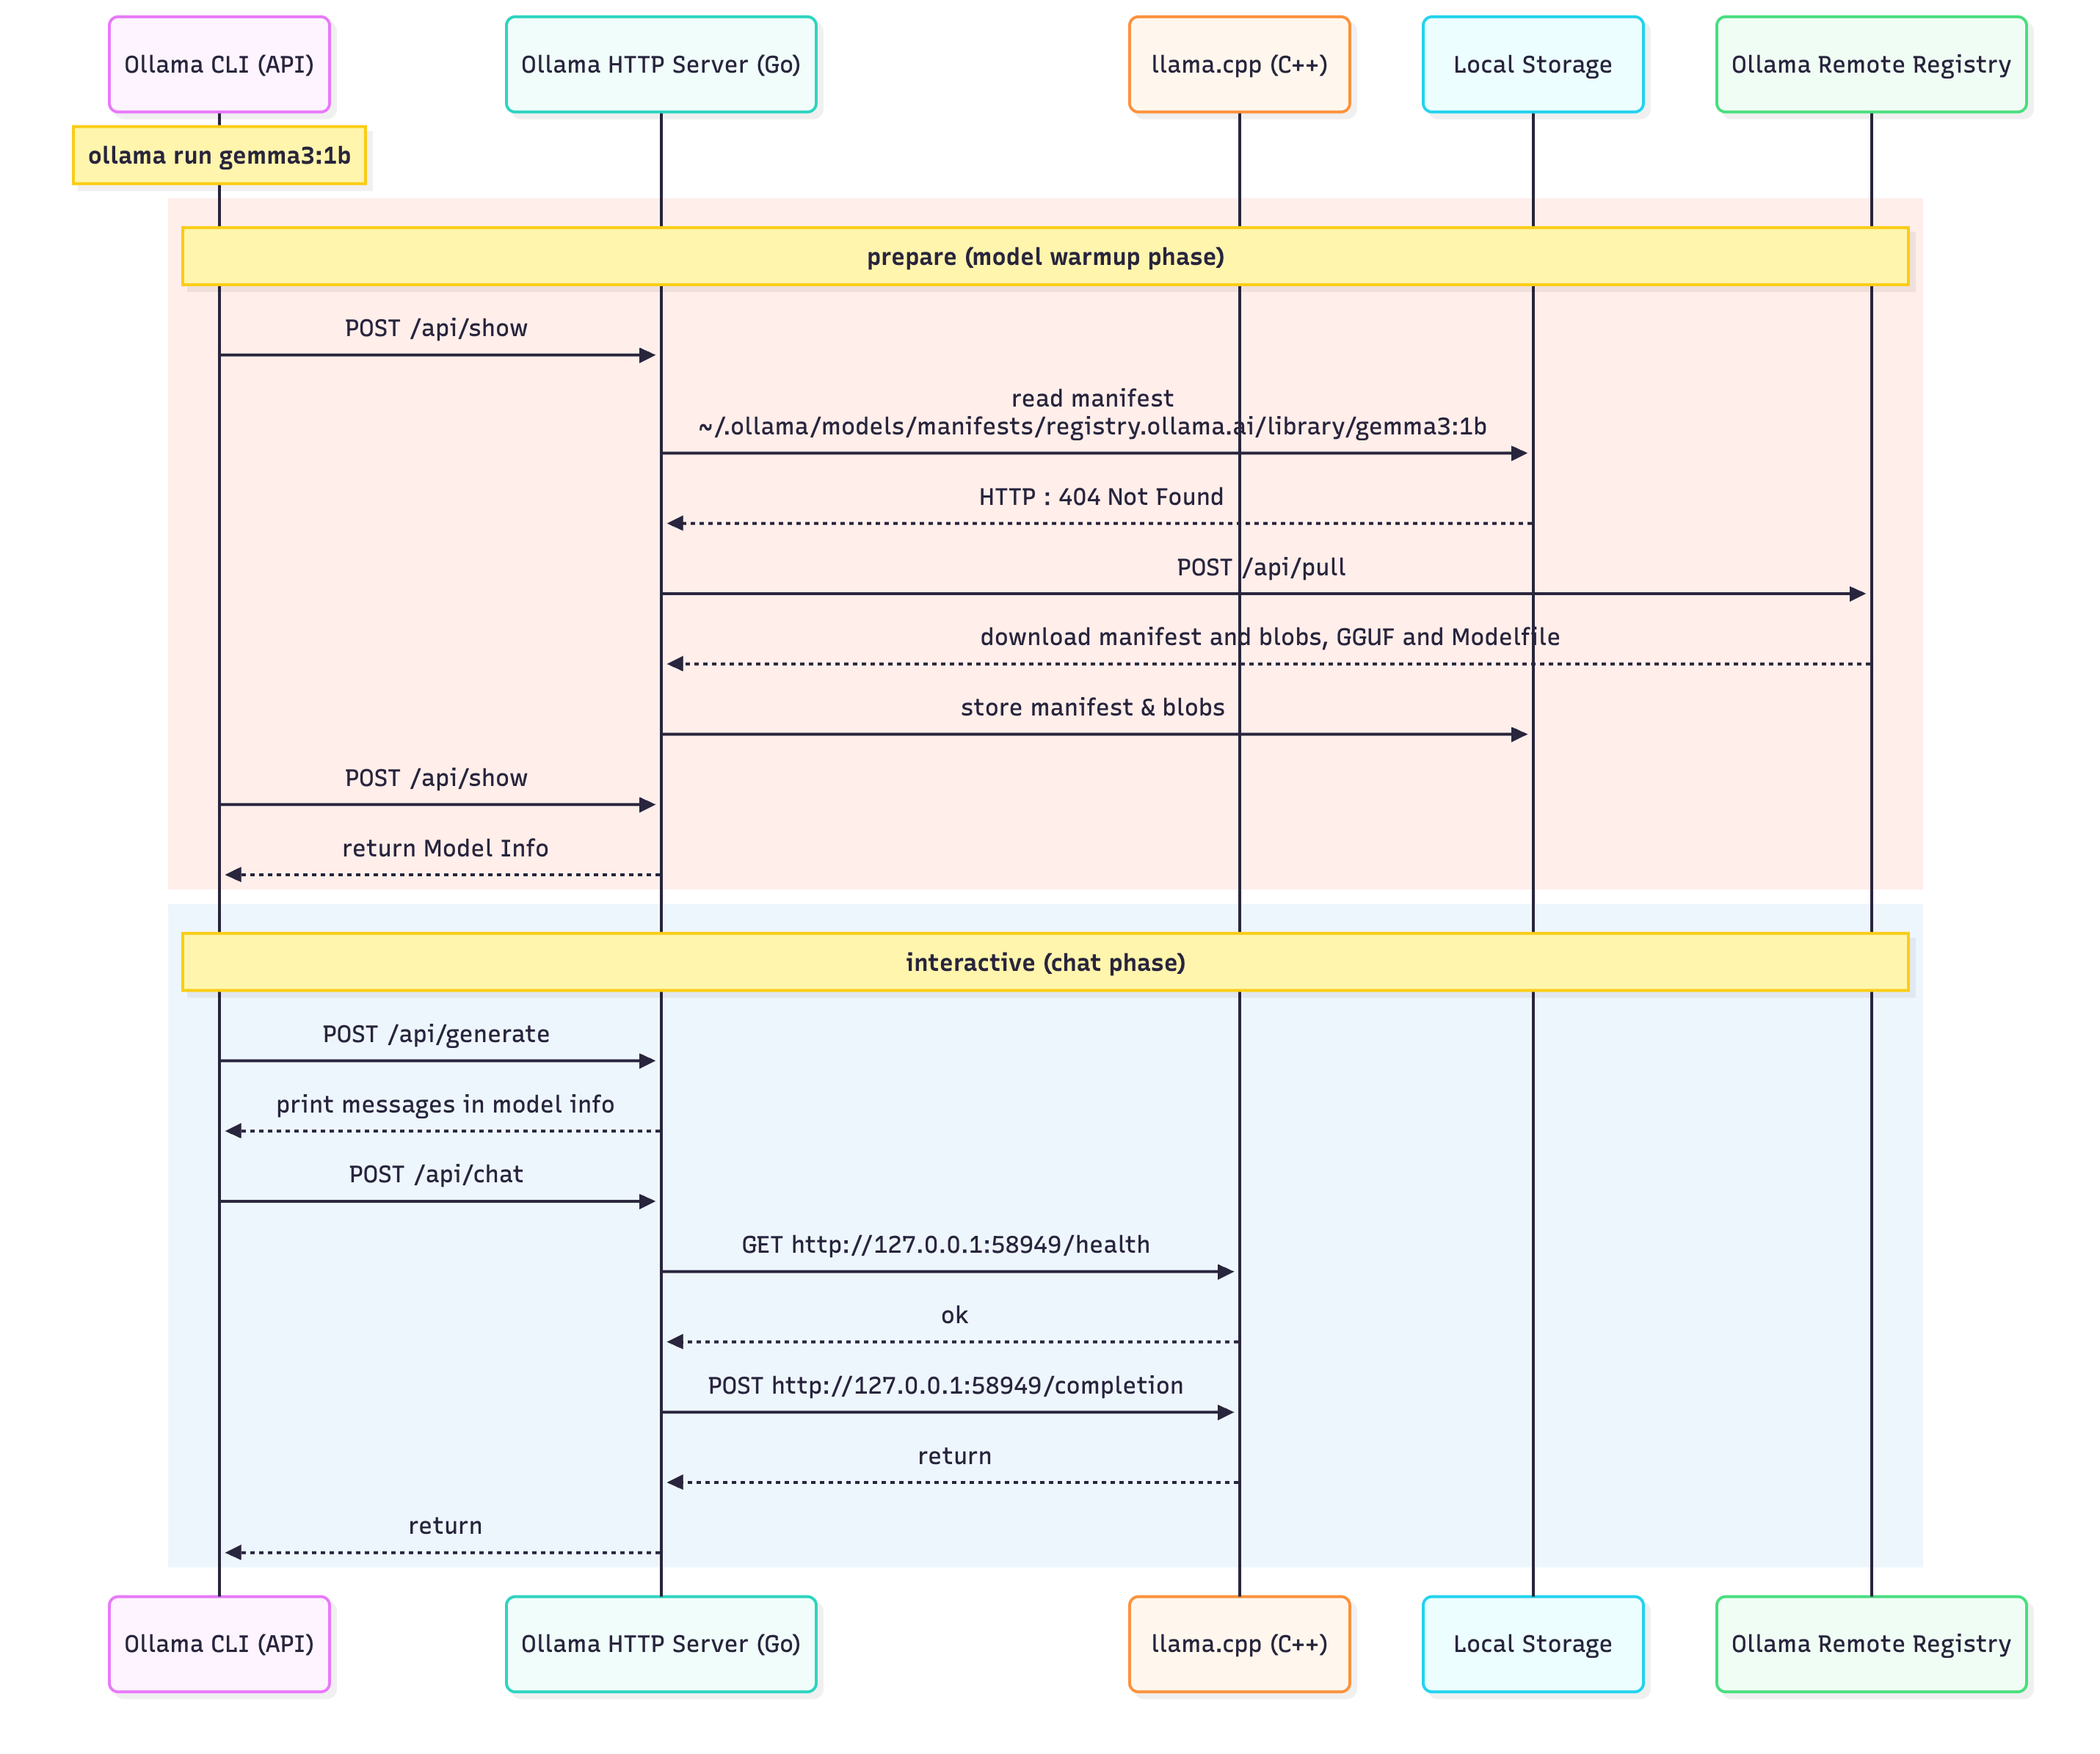
The End-to-End Ollama Workflow
In Figure 5 below, we map every action that takes place once you start a model using the Interactive CLI (Terminal) to chat with your model. Starting with loading using `ollama run <model_name>:<version>`, the HTTP Server will route the request and start a `llama.cpp` server to act as the Inference Engine.
Then, with each input prompt, the Ollama server routes it to llama.cpp for inference, and streams back the generated tokens.
Running pre-defined models is pretty straightforward, with no additional steps required. However, for adding custom models, we have a few options that is downloading a model from Ollama Library, editing a model locally, or bringing our own model from a HuggingFace GGUF Checkpoint.
Ollama Models Locally
Before showcasing how to register new models with Ollama, first, we have to explain what a Modelfile is.
Def: From the documentation, a Modelfile is the blueprint to create and share models with Ollama.
If you think of an Ollama model as a Docker Image, the Modelfile is similar to the Dockerfile used to build the layers for that image. In an Ollama Model file, we store the source of the model, the parameters such as Chat Template, Sampling TopK, TopP, Documentation, License, and other additional fields as a blueprint configuration for the model.
Here’s a basic example (from the docs):
FROM llama3.2
# sets the temperature to 1 [higher is more creative, lower is more coherent]
PARAMETER temperature 1
# sets the context window size to 4096, this controls how many tokens the LLM can use as context to generate the next token
PARAMETER num_ctx 4096

# sets a custom system message to specify the behavior of the chat assistant
SYSTEM You are Mario from super mario bros, acting as an assistant.
Also, for downloading models locally, you could simply use the `ollama pull` command and inspect the Ollama Model Library for any model.
ollama pull gemma3:4b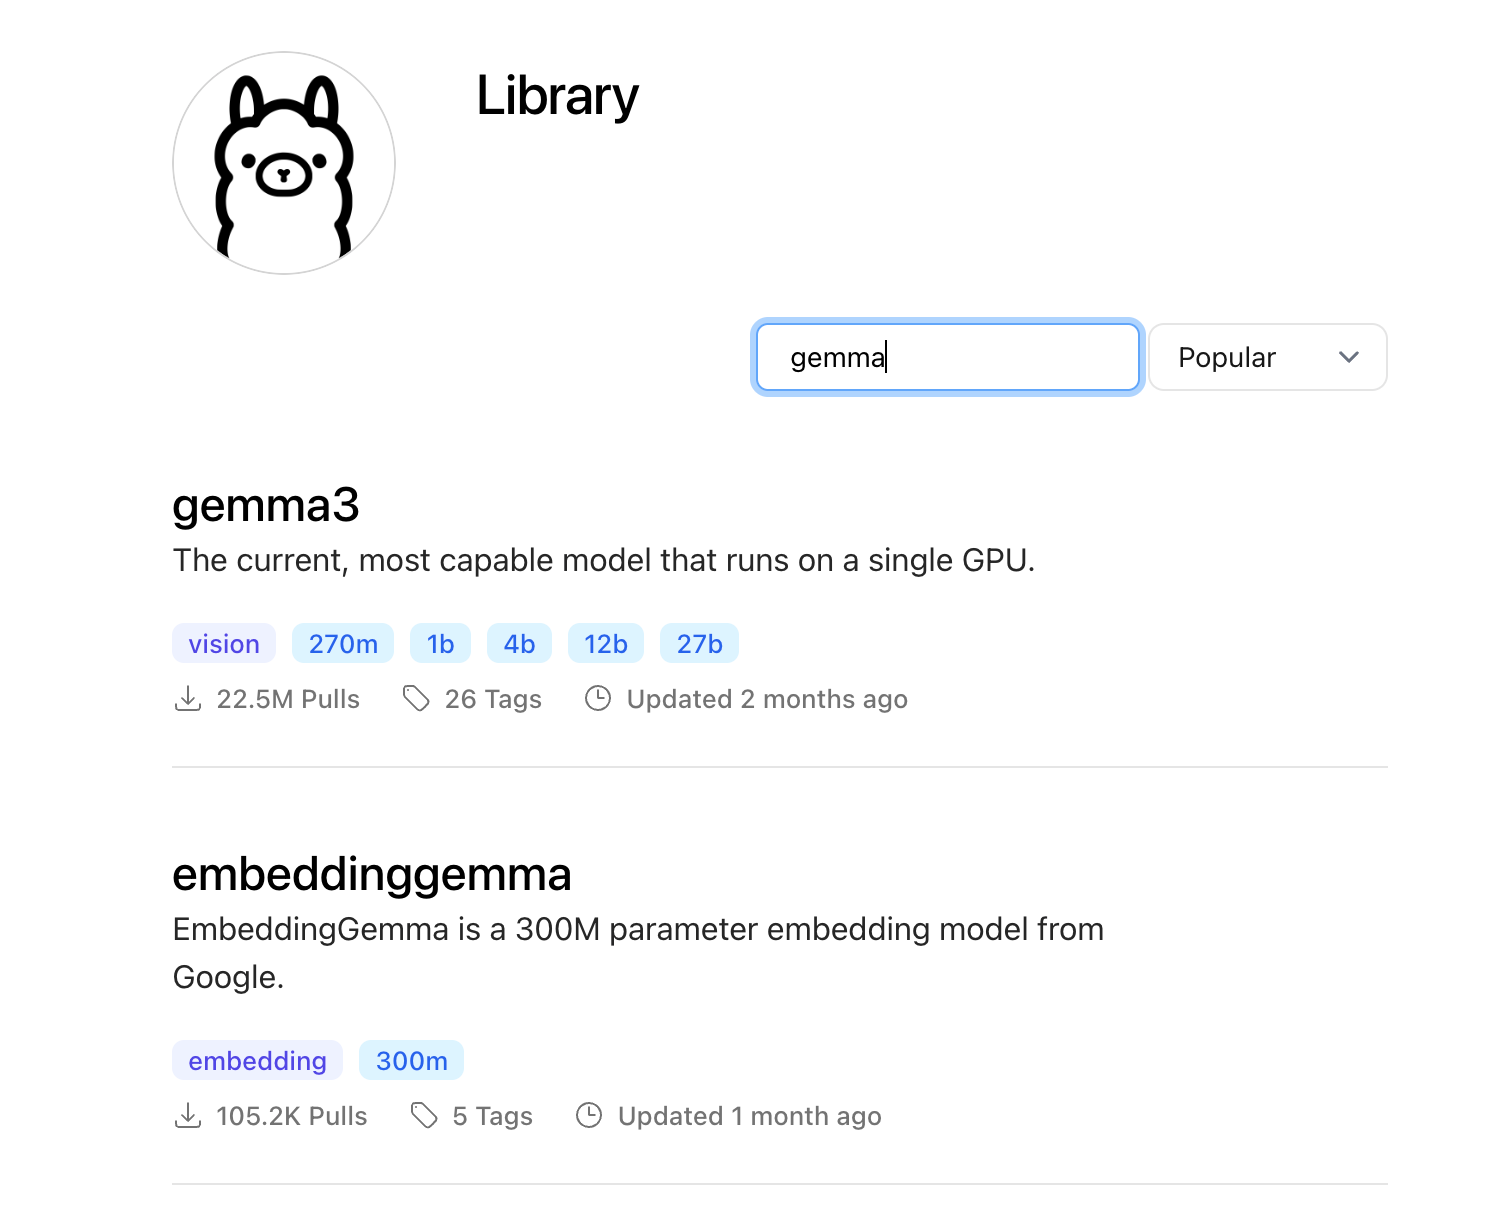
In the following live-coding segment, we’ll go through:
Viewing Model files for existing Models
Editing the Gemma3-1B Model file and registering a new Model
Comparing model versions by changing the Sampling Configurations
Adding Models from HuggingFace
As a second option, we could download GGUF checkpoints for any LLM model from HuggingFace and register them as a custom model in our local Ollama registry.
In the following live-coding segment, we’ll go through:
Creating a Python Environment with UV
Installing the HuggingFace Hub CLI
Authenticating using an Access Token
Downloading Phi-3-mini-4k-instruct-Q4_K.gguf
Registering and testing it in Ollama
Running Ollama OpenAI API Python Client
In the previous examples, we’ve showcased the Interactive Ollama Client, which runs in the CLI. That’s more of a playground, or for rapid prototyping to test how your model responds to different queries.
On a more serious note, if we build a real AI project, we need to define the client as part of an API or the Application itself. In this section, we’ll showcase how one could create an Ollama Client in Python using the OpenAI API Schema-compatible endpoints.
Info: When OpenAI launched the GPT-3 API in mid-2020, it was the first widely available commercial API, so developers got the time to familiarize themselves with the Schema formats and endpoints. Furthermore, to address the same developer base, the new frameworks and LLM providers choose to “adapt” to this schema format.
The popular endpoints that you might’ve seen elsewhere if you’ve worked with LLM providers’ APIs are:
/v1/completions: Text completions for a single, free-form text prompt.
/v1/chat/completions: Generates conversational responses.
/v1/models: Lists the available models, the server can load from cache.
/v1/embeddings: Returns the raw embeddings of a text input.
In the following video segment, we’re going to demonstrate how one can build and connect to the Ollama Server directly from Python, following the OpenAI API schema.
Running Ollama Server in Docker
If you build a multi-container application, the best solution is to run both the Ollama Server and your Application Client as separate Docker containers. Since last year, Ollama has been available as a Docker container that you could start up quite easily.
For CPU Only
docker run -d -v ollama:/root/.ollama -p 11434:11434 --name ollama ollama/ollamaFor GPU Accelerated (NVIDIA)
You have to mount the GPUs using `—gpus=all` such that Docker socket can allow the container to use the GPU interface.
docker run -d --gpus=all -v ollama:/root/.ollama -p 11434:11434 --name ollama ollama/ollamaFor starting a model
docker exec -it ollama ollama run gemma3:1bService in Docker Compose
Using this setup, you could add more services to your Docker Compose and build a more advanced application with a robust and reproducible way for deployment.
version: “3.9”
services:
ollama:
image: ollama/ollama:latest
container_name: ollama
restart: unless-stopped
ports:
- “11434:11434”
volumes:
- <your_cache>:/root/.ollama
networks:
- ollama-net
environment:
- OLLAMA_HOST=0.0.0.0
deploy:
resources:
reservations:
devices:
- driver: nvidia
count: all
capabilities: [gpu]
networks:
ollama-net:
driver: bridge
volumes:
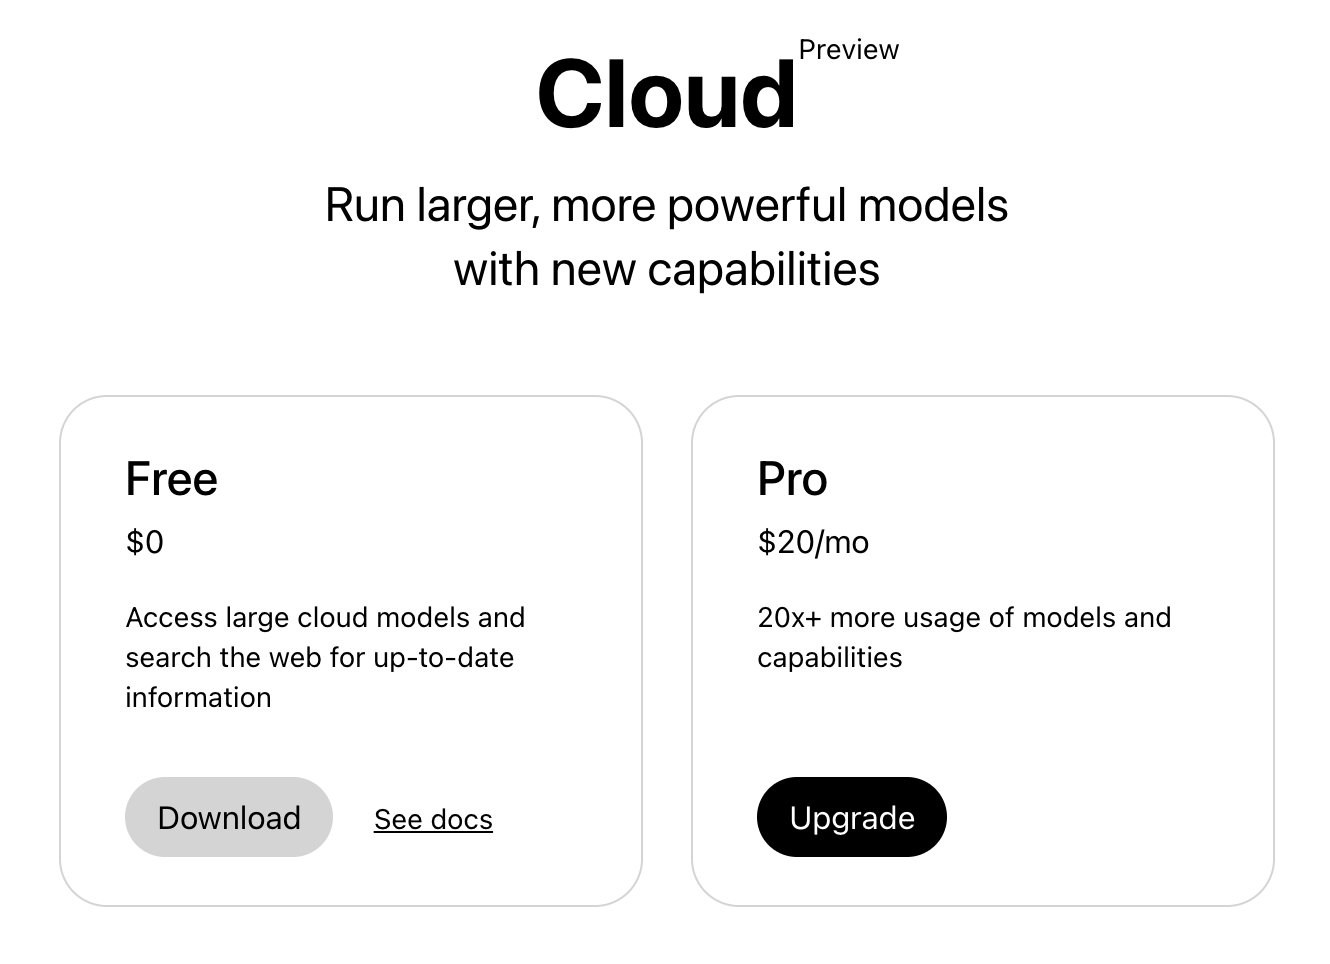
<your_cache>:Ollama Cloud
Ollama’s cloud is a new way to run open models using datacenter-grade hardware. Many new models are too large to fit on widely available GPUs or run very slowly. Ollama’s cloud provides a way to run these models fast while using Ollama’s App, CLI, and API.
Conclusion
In this article, we’ve explored Ollama in depth, how it works under the hood, and how you can install, configure, and experiment with models using the CLI, Docker, or Python.
Ollama is one of the most, if not the most, developer-friendly solutions for running LLMs locally. It builds on top of the llama.cpp runtim, while abstracting away the complexity of model loading, quantization, and inference management. Its built-in high-performance HTTP server, written in Go, handles the multi-model orchestration and efficient request handling, all out of the box.
If you’re prototyping with small checkpoints, fine-tuning your own models, or deploying local LLMs for your Chatbots or Agentic Applications, Ollama is the best solution for that.
In the first two articles, we covered llama.cpp, GGML, GGUF and Ollama. In the next series, we’ll move further towards building a more complex AI System and Agents, where we’ll be using Ollama and GGUF model checkpoints for local inference.
Stay tuned!
Images and Media were generated by the author, if not otherwise stated.
References
[1] Ollama. (2024). Ollama. https://ollama.com/blog/openai-compatibility
[2] Ollama. (2023). Ollama. https://ollama.com/blog/ollama-is-now-available-as-an-official-docker-image
[3] OpenAI Platform. (2025). Openai.com. https://platform.openai.com/docs/api-reference/introduction
[4] openai/openai-openapi: OpenAPI specification for the OpenAI API. (2023, June 19). GitHub. https://github.com/openai/openai-openapi?tab=readme-ov-file
[5] Razvant, A. (2025, October 18). An AI Engineer’s Guide to Running LLMs on CPUs, GPUs, and Edge Devices. Substack.com; Neural Bits. https://multimodalai.substack.com/p/an-ai-engineers-guide-to-running
[6] Razvant, A. (2025, February 20). Understanding LLM Inference. Substack.com; Neural Bits. https://multimodalai.substack.com/p/understanding-llm-inference
Great runtime integration and services to the same for the good 😊
Open source LLM containers as engine and services to the same for the good 😊